Colour elements by a property
Goal: paint model items by what a property says, first with one colour for a match, then with a different colour for every value.
Before you start
- Open a model in Navisworks (any product) and open the CamelGraph editor from the BIMCamel ribbon tab.
- Know the tab and the property you want. If you do not, read Find the name of a tab or property first.
- Save the model. A run changes colours in the open document.
Part A: one colour for everything that matches
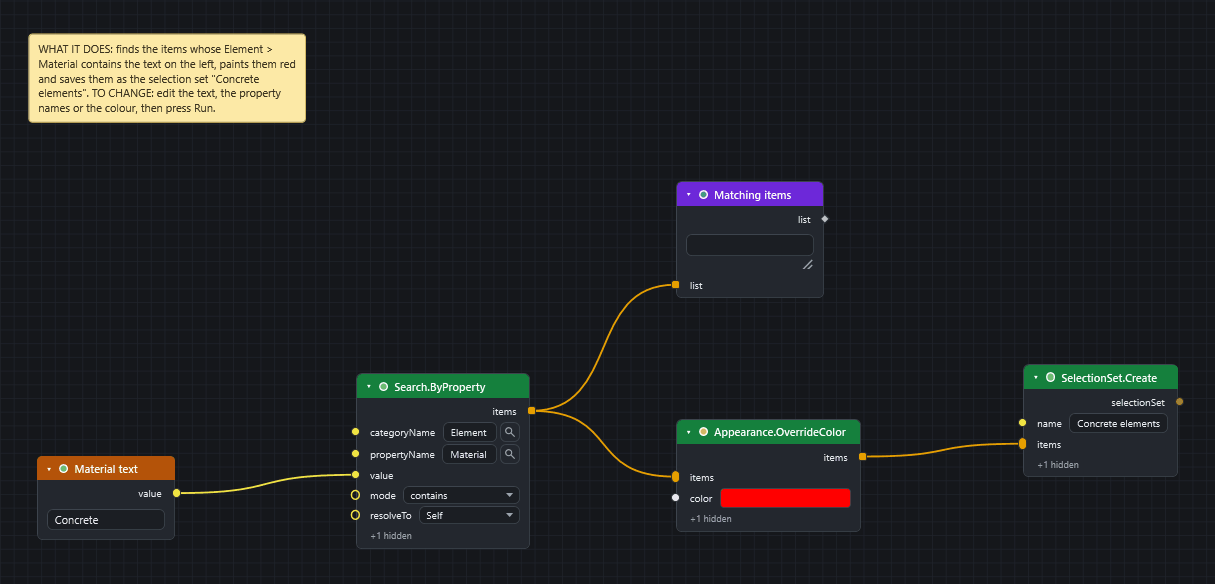
- Add a
Stringnode (Input). Double-click its title and rename itMaterial text. TypeConcreteinto it. - Press Space over the canvas, type
Search.ByPropertyand press Enter. The node is in Navisworks ▸ Search. TypeElementintocategoryNameandMaterialintopropertyName, and choosecontainsin themodedrop-down. Use the names your model shows. Wire thevalueoutput of theStringinto thevalueinput. That input accepts any kind of value, so it has no box of its own: you wire aString(orNumber) node into it. - Add
Appearance.OverrideColor(Navisworks ▸ Appearance). Wireitemsfrom the search into itsitems. - Click the swatch on its
colorinput and choose red.coloralso accepts a#RRGGBBtext such as#FF0000wired in from aStringnode. - Press F5. Every matching item turns red in the Navisworks view.
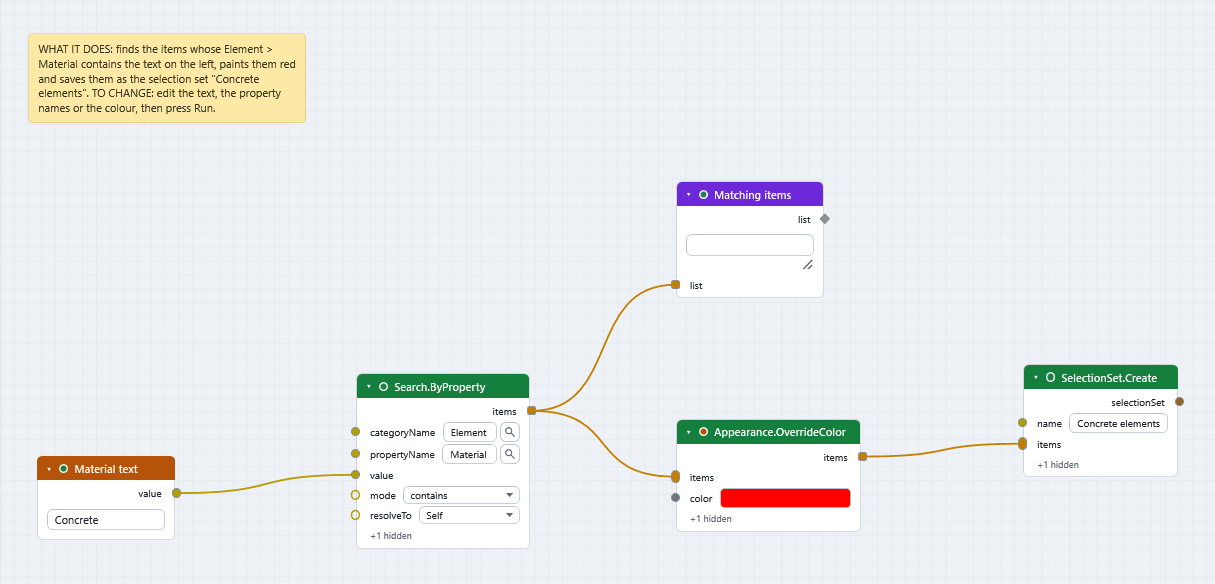
The downloadable graph also puts a Watch List on the search result and saves the items as a selection set (Save selection sets).
To take the colour back, use Appearance.Reset on the same items, or Appearance.ResetAll for the whole model (both in Navisworks ▸ Appearance).
Part B: a different colour for every value
This colours, for example, every item by its level.
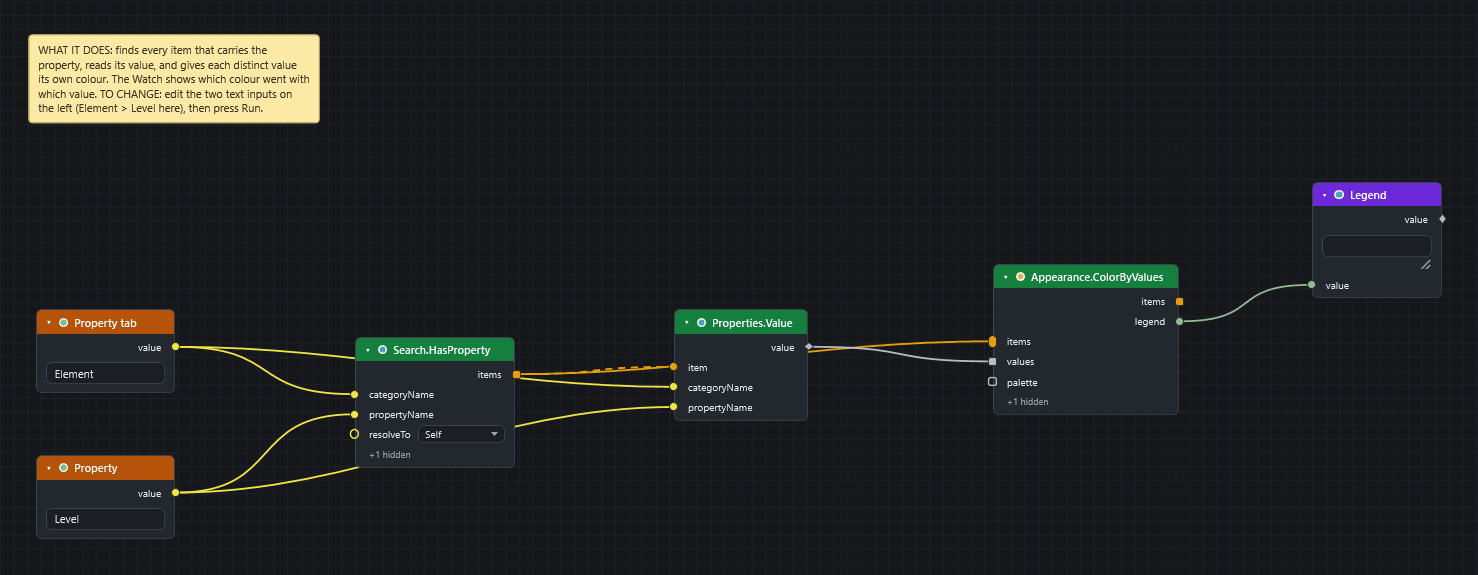
- Add two
Stringnodes (Input). Rename themProperty tabandProperty, and typeElementandLevelinto them. Both searches below use the same two texts, so you change them in one place. - Add
Search.ByProperty(Navisworks ▸ Search) and chooseexistsinmode. WireProperty tabinto itscategoryNameandPropertyinto itspropertyName;valuestays empty. It finds every item that carries the property. (The download usesSearch.HasProperty, which is retired and does the same.) - Add
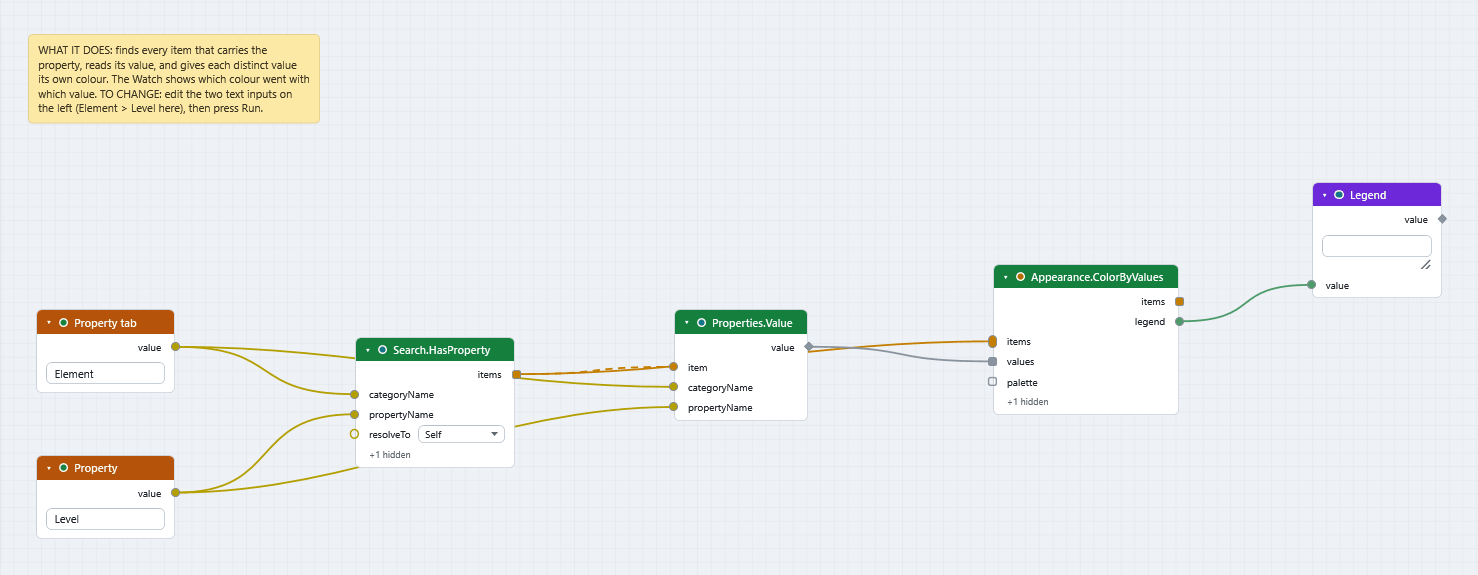
Properties.Value(Navisworks ▸ Properties). Wire the searchitemsinto itsiteminput, and wireProperty tabandPropertyinto its two name inputs too. The wire intoitemis dashed: the node runs once per item and gives one value per item. - Add
Appearance.ColorByValues(Navisworks ▸ Appearance). Wire the searchitemsinto itsitemsand thevalueoutput ofProperties.Valueinto itsvalues. - Add a
Watchnode (Display), rename itLegend, and wire thelegendoutput into it. - Press F5.
What you get
- Part A: a normal Navisworks colour override on the matching items. It is saved with the model file.
- Part B: each distinct value gets its own colour from a built-in palette. When every value is a number, the colours run from blue to red instead. The
legendoutput lists each value with its colour as#RRGGBB. - To choose the colours yourself, wire a list of colours into the optional
paletteinput. They are used in turn, one per distinct value.
Keep the lists the same length
Appearance.ColorByValues needs one value for each item. If it says "Got 40 items but 38 values", the two lists came from different searches. Wire the same list into both.
If it does not work
- The search finds nothing: see A search returns nothing.
- Nothing changes when you press Run: see Nothing happens when I press Run.
- A node is red: see Read errors and warnings.
Next
- Save selection sets to keep what you found.
- Appearance nodes lists every colour, transparency and hide node.
- Your first script builds Part A step by step.